Understanding the Stress Intensity Factor Abaqus
If you’ve ever tried to calculate the stress intensity factor Abaqus, you’ve probably noticed the mysterious Contour Integral option. Yet few tutorials actually explain how it works or how to set it up correctly. In this guide, we’ll break down the full workflow step by step using a Single Edge Notch Tension (SENT) sample, explaining how to model the crack, define the contour region, and interpret the final results.
If you’d rather skip straight to the simulation or want to verify your setup, you can watch the full tutorial video here or download the Abaqus files directly from the links below.
🎥 Watch full tutorial: FEA Master YouTube Channel
📦 Download files: SENT Contour Integral Abaqus Files (Direct Download)
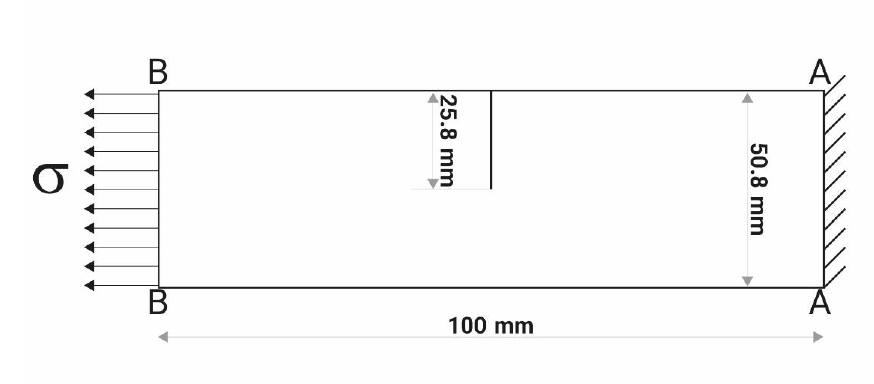
Model Setup: Single Edge Notch Tension (SENT)
We start stress intensity factor Abaqus by creating a 2D planar deformable shell model. The specimen is 100 mm long and 50.8 mm high, with a crack length of 25.4 mm. Inside Abaqus, this geometry can be sketched quickly by defining a rectangle and trimming one edge to represent the crack tip. Once the sketch is complete, click the middle mouse button to finish and confirm the dimensions.
Material Definition and Section Assignment
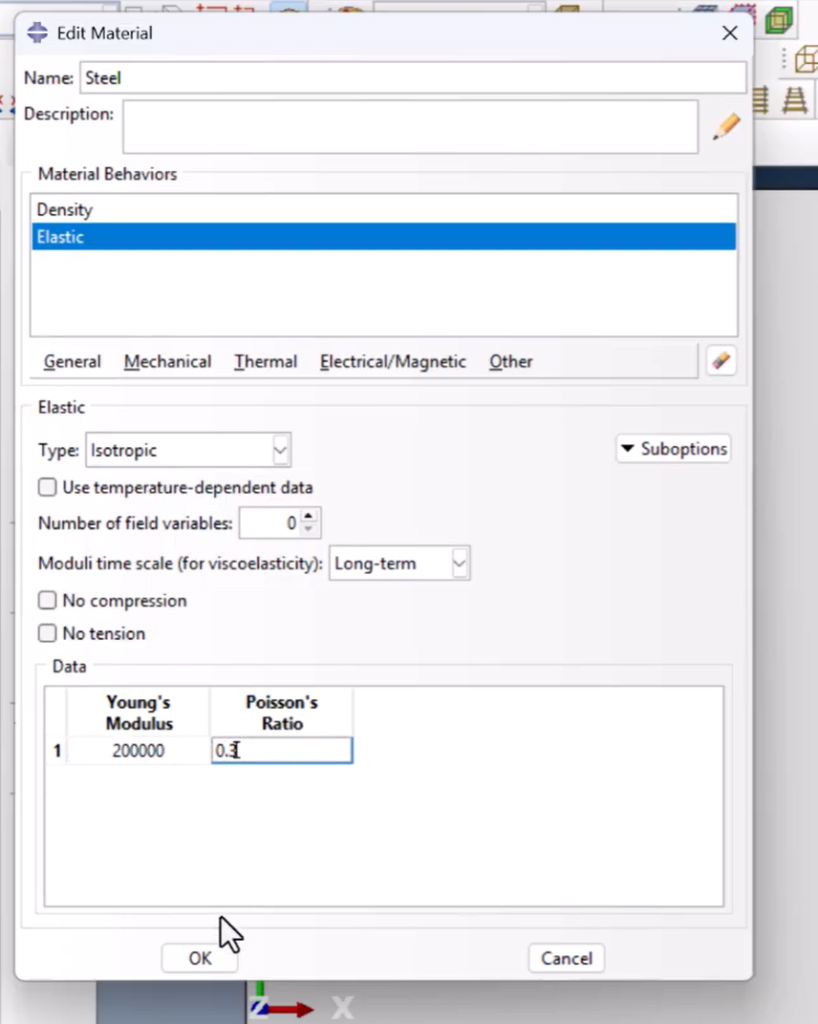
Next, create a steel material under the Property module. Set the density to 7.8E-09, the Young’s modulus to 200000 MPa, and the Poisson’s ratio to 0.3. Even though the part is defined as a shell, the section must be Solid Homogeneous, with a plane strain thickness of 25.4 mm. This is essential for accurate stress intensity factor evaluation later in the analysis.
Assign this section to the entire geometry and verify that it turns green in the viewport, which confirms that the material has been successfully applied.
stress intensity factor Abaqus
Assembly and Step Definition
Move to the Assembly module and create an independent instance of the part at the origin. In the Step module, define a Static, General step. The default incrementation settings are sufficient for this analysis, but make sure to enable Field Output and History Output because these will record your stress intensity factor and J-integral results during the simulation.
stress intensity factor Abaqus
Crack Definition and Contour Integral Setup
The next stage happens in the Interaction module. This is the most critical step of the entire process because an incorrect crack definition can invalidate the simulation.
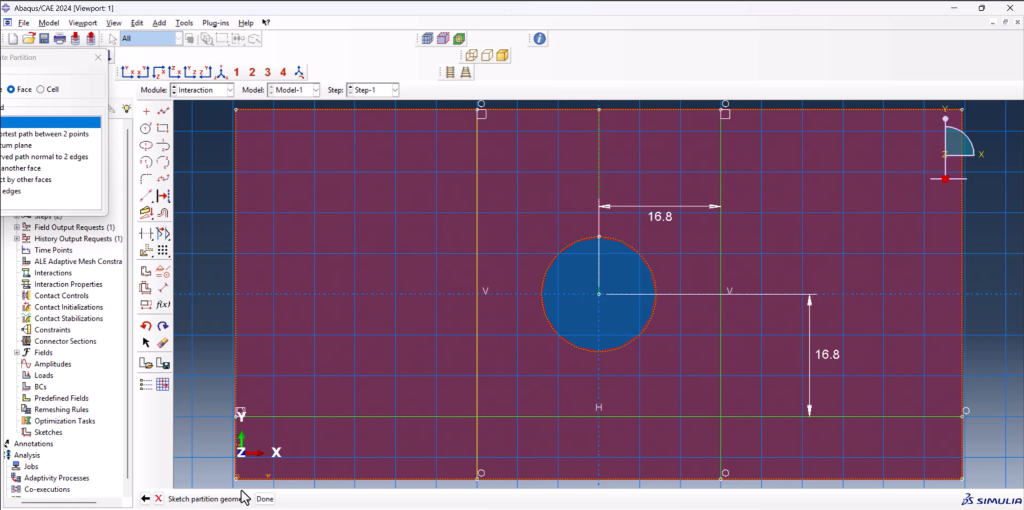
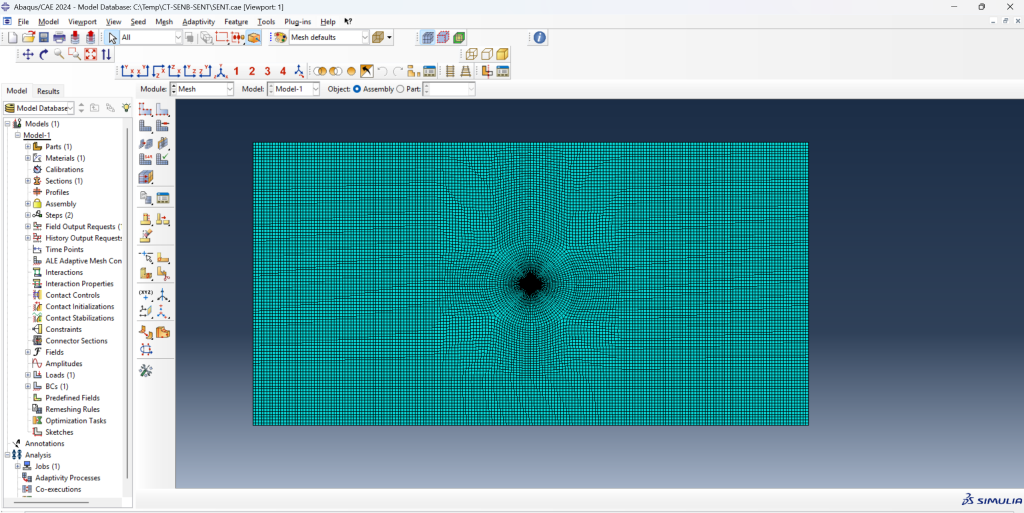
First, partition the face of the model. Create a vertical line at the crack tip to represent the crack front. Then, create a circular partition with a radius of 7.9 mm centered on the crack tip—this defines the contour region for the stress intensity factor calculation. Add two horizontal partition lines positioned 16.8 mm away from the circle center on both sides to form clean mesh regions around the crack.
stress intensity factor Abaqus
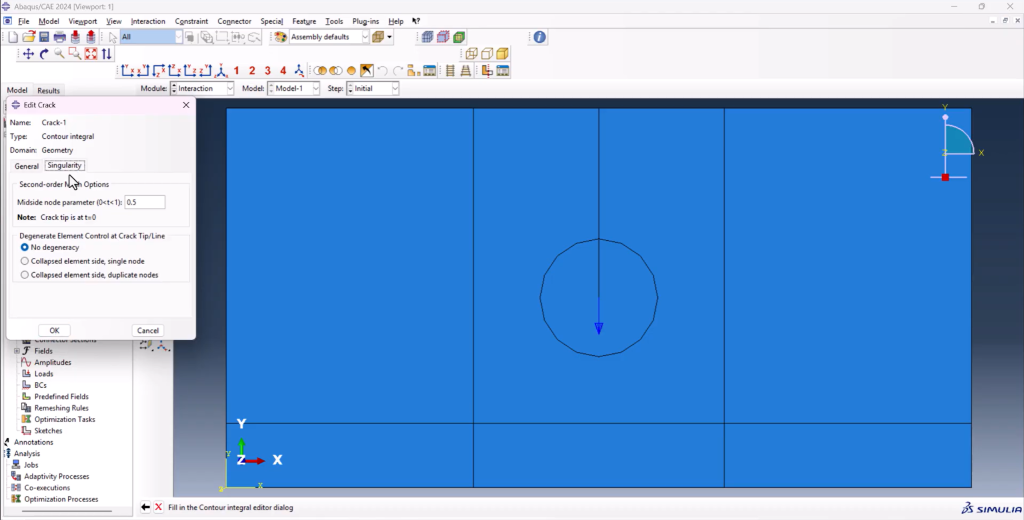
Once the geometry is partitioned, assign the seam along the crack path using Special → Crack → Assign Seam. Select the two connected edges of the crack line and confirm.
Then create the Contour Integral Crack itself. Define the crack front using the seam you just created, assign Q-vectors with the orientation [0, -1, 0], and set the singularity radius to 0.25. For the collapse element side, choose Single Node to ensure proper quarter-point elements near the crack tip.
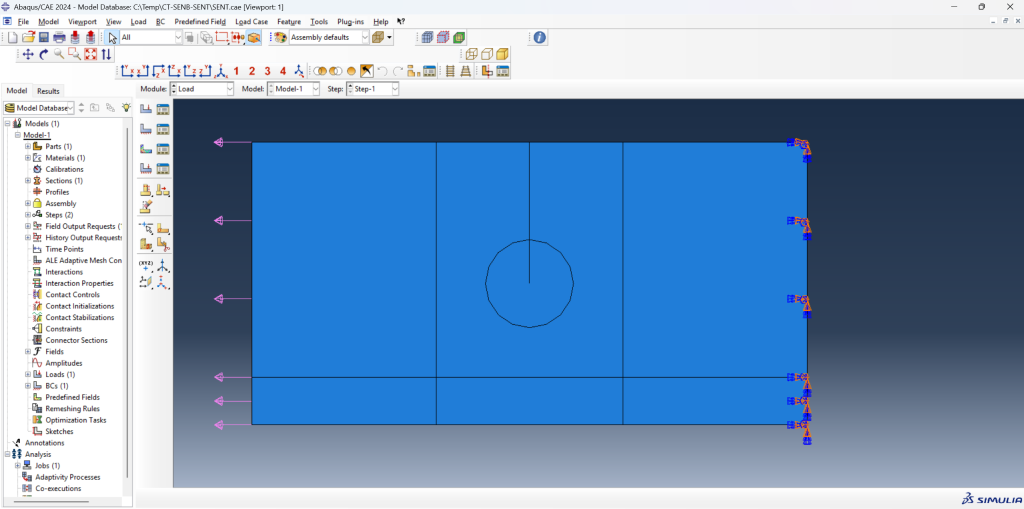
Applying Loads and Boundary Conditions
In the Load module, create a pressure load on the right edge of the sample to apply tensile stress. To generate tension rather than compression, enter -15.5 MPa as the pressure magnitude.
Then define an Encastre boundary condition on the opposite side (the left edge) to fully restrain the specimen. This setup represents a simple tensile test that opens the crack under uniform loading.
stress intensity factor Abaqus
Meshing for Accurate Stress Intensity Factor Abaqus Results
Proper meshing is vital for obtaining accurate contour integral results. Use sweep meshing for the crack region and quad-dominant elements elsewhere. Select Quadratic Plane Strain elements without reduced integration.
A coarse mesh with element size = 2 mm will run quickly but yield inaccurate results. Refining to 1 mm or 0.5 mm near the crack tip significantly improves precision. In the video demonstration, the coarse mesh produced a stress intensity factor of 1.2 × 10³, while the refined mesh achieved 2.4 × 10³ MPa√m, showing the impact of mesh density on fracture results.
stress intensity factor Abaqus
Creating and Submitting the Job
Once the setup is complete, open the Job Manager, name the job SENT Contour Integral, and submit it. Abaqus will process the crack front definition and compute the J-integral and stress intensity factor values for each contour around the crack tip.
stress intensity factor Abaqus
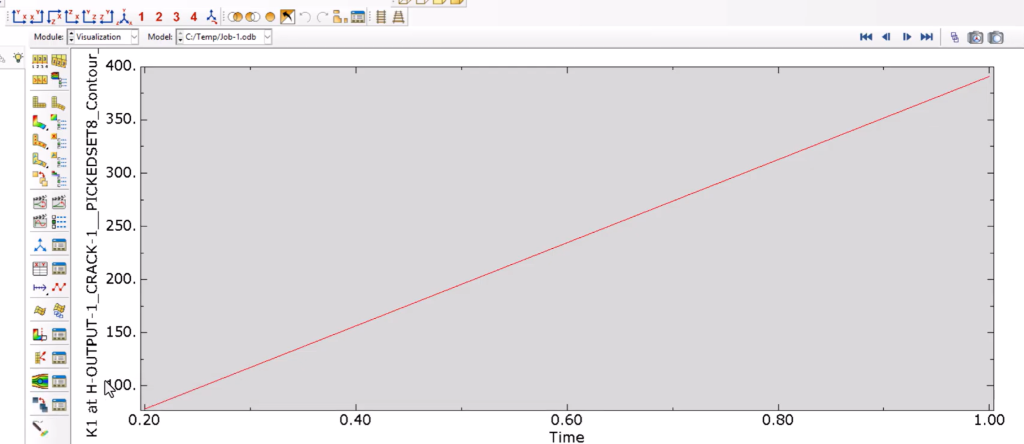
Post-Processing: Reading the Results
After the job finishes, open the ODB file. Use History Output to plot the Stress Intensity Factor versus Time curve. You’ll see that different contour levels converge toward a consistent SIF value as the mesh becomes finer.
stress intensity factor Abaqus
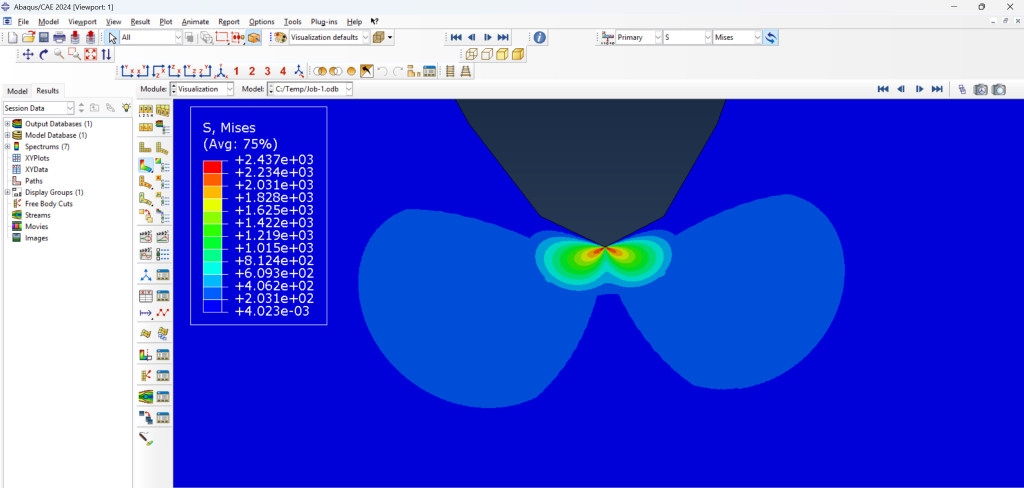
Visualizing the contour field near the crack tip confirms how the stress redistributes along the crack front. Finer meshes reveal a much smoother gradient, proving that mesh refinement is key to achieving stable results.
stress intensity factor Abaqus
Why the Contour Integral Method Matters
The Contour Integral method in Abaqus automatically evaluates path-independent integrals around a crack tip, allowing you to compute K-values (Modes I, II, III) and energy release rates directly. Unlike manual stress extrapolation, this approach provides a more stable and mesh-insensitive measure of fracture toughness.
stress intensity factor Abaqus
Final Thoughts
And that’s it — you’ve just completed a full Stress Intensity Factor Abaqus simulation using the Contour Integral technique. You now know how to model the crack, refine the mesh, apply loads, and interpret the resulting SIF and energy release rate plots.
To take your analysis even further, try extending this SENT example into a full XFEM crack propagation simulation in Abaqus.
🎥 Watch the complete walkthrough on YouTube: Stress Intensity Factor with Contour Integral in Abaqus — Finally Explained!
📦 Download ready-to-run files here: Abaqus SENT Crack Simulation Package
stress intensity factor Abaqus